Installing linoleum flooring can be a rewarding and cost-effective way to upgrade your space. With its durability, eco-friendly properties, and ease of maintenance, linoleum flooring has become a popular choice for many homeowners. In this step-by-step guide, we’ll walk you through the process of installing linoleum flooring like a pro. So, let’s get started!
What is Linoleum?
The true name, linoleum is a type of resilient flooring made from natural materials, primarily linseed oil, pine resin, wood flour, cork dust, and mineral fillers. These materials are mixed together and pressed onto a jute backing, creating a durable and environmentally-friendly flooring option. Linoleum is available in various colors, patterns, and styles, making it a versatile choice for both residential and commercial spaces. Its natural composition makes it biodegradable, making it an eco-conscious option for those seeking sustainable flooring solutions. Linoleum is mostly made in Europe because of the type of chemicals and manufacturing machines, since this product has been around for over 100 years.
Although the two do have their differences, most people call vinyl sheet goods, linoleum because it comes in sheets and rolls out in a tile like format. In this article, we will cover both linoleum and sheet vinyl flooring.
Why is Linoleum a Popular Choice?
Linoleum’s popularity stems from a combination of its many advantageous features, which set it apart from other flooring options. Here are some of the reasons why linoleum remains a top choice among homeowners and businesses alike:
- Eco-Friendly: As an all-natural flooring material, linoleum is biodegradable and doesn’t release harmful chemicals into the environment. This appeals to environmentally-conscious individuals looking to reduce their carbon footprint.
- Durability: Linoleum and vinyl sheet goods are highly durable and can withstand heavy foot traffic, making it suitable for high-traffic areas like kitchens, hallways, and commercial spaces. Properly installed and maintained linoleum can last for decades.
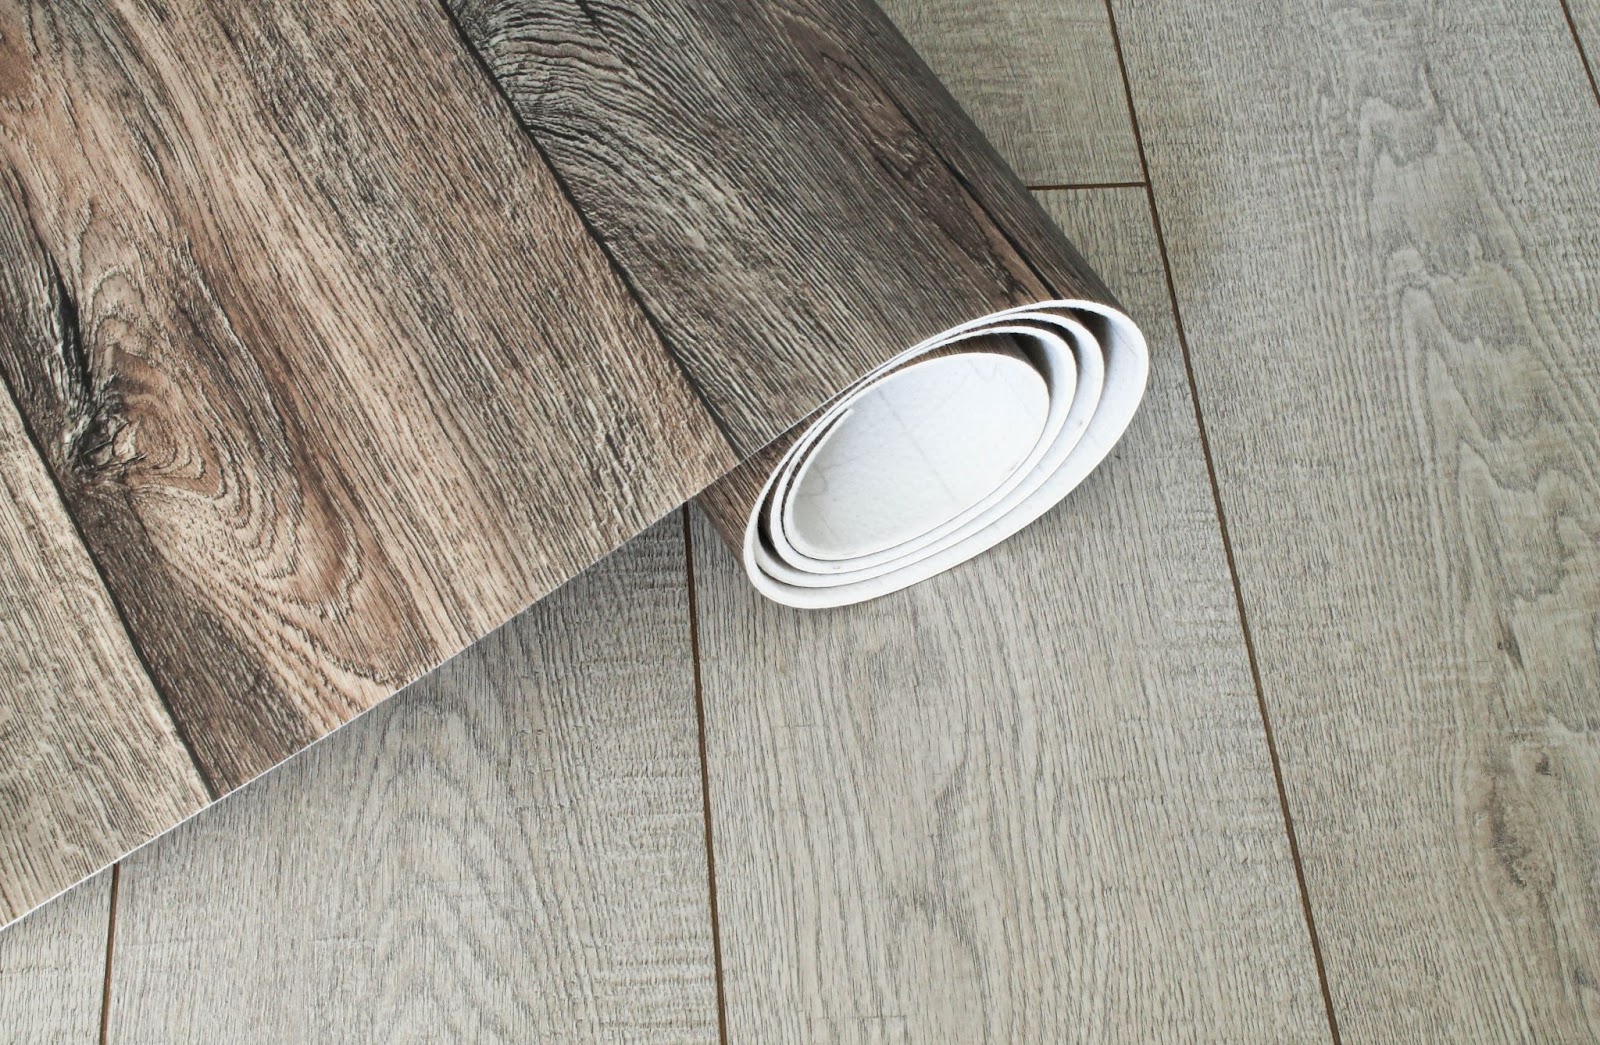
- Wide Range of Designs: Linoleum is available in a vast array of colors and styles, allowing homeowners to find the perfect flooring that compliments their interior design. Vinyl goods come in a wider 12 ft width and have the most popular reproductions of natural designs of Hardwood and Ceramic Tile look-alikes.
- Resilient and Comfortable: Linoleum and sheet vinyl have a slight bounce, providing a comfortable surface to walk on for extended periods. It also absorbs noise, making it a quieter flooring option.
- Easy to Clean and Maintain: Regular sweeping and occasional mopping are generally sufficient to keep linoleum flooring in excellent condition. Its surface is resistant to stains, and most spills can be easily wiped away.
- Affordable: Compared to some other flooring materials, linoleum and sheet vinyl are relatively cost-effective, offering great value for its durability and aesthetic appeal.
Preparing for Installation
Before you begin the installation process, it’s essential to prepare the area properly. Follow these steps to ensure a smooth and successful installation:
- Clear the room: Remove all furniture and obstacles from the area to create an open space for installation.
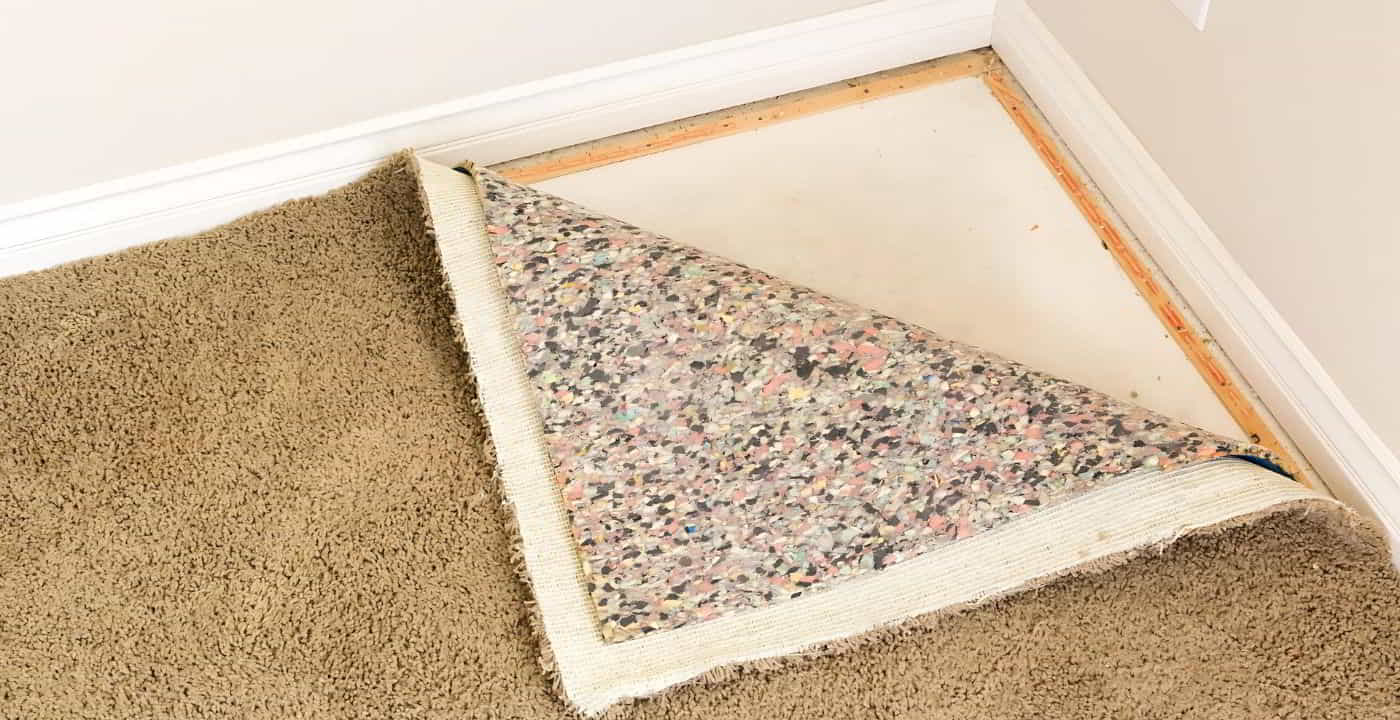
- Clean the subfloor: Ensure the subfloor is clean, dry, and free from any dust, debris, or imperfections that could affect the new flooring’s adherence. It’s important to note that a clean smooth concrete slab or installation of luan hardwood is needed if installing over a plywood subfloor.
- Measure the space: Accurately measure the room’s dimensions to calculate the amount of linoleum flooring needed. Add an extra 5-10% to account for any mistakes or irregularities.
Gathering the Necessary Tools and Materials
Before you start laying the linoleum flooring, you’ll need to gather a few things.
Linoleum flooring sheets or tiles: Purchase linoleum flooring in the design and quantity required for your space.
- Adhesive: Choose a high-quality adhesive that suits your specific flooring type.
- Trowel: Get a suitable trowel to apply the adhesive evenly on the subfloor.
- Utility knife: A sharp utility knife will help you cut the linoleum sheets or tiles accurately.
- Measuring tape: Use a measuring tape to mark and cut the linoleum precisely.
- Straight edge: A straight edge is essential for making clean and accurate cuts.
- Roller: A flooring roller will help to firmly bond the linoleum to the subfloor.
- Safety gear: Wear safety goggles and knee pads for protection during installation.
How to Lay Linoleum Flooring – Step-by-Step Installation Process
-
Acclimate the Linoleum
Allow the linoleum flooring to acclimate in the room for at least 24 hours before installation. This step ensures that the flooring adjusts to the room’s temperature and humidity, reducing the risk of expansion or contraction post-installation.
-
Lay Out the Linoleum
Unroll the linoleum or sheet vinyl and let them sit flat for a few hours to eliminate any curling. Ensure that the linoleum aligns with the room’s walls and that any patterns or designs are consistent.
-
Apply the Adhesive
Using the recommended size trowel, spread the linoleum adhesive evenly on the subfloor, following the manufacturer’s instructions. Work in small sections to avoid the adhesive drying before you can lay the linoleum.
-
Lay the Linoleum
Carefully place the linoleum sheets or tiles on the adhesive-covered subfloor. Press down firmly and use a flooring roller to remove any air bubbles and ensure a secure bond.
-
Trim and Cut
Using a utility knife and straight edge, trim any excess linoleum along the walls and around obstacles, such as door frames. Take your time to achieve precise cuts for a professional finish.
-
Seal
Use the recommended seam sealer on all seams.
Final Steps
After the linoleum is installed, take these final steps to complete the process:
Allow the adhesive to dry: Follow the adhesive manufacturer’s guidelines for drying time before allowing foot traffic on the new flooring.
Replace furniture: Once the linoleum is fully dry, move furniture back into the room with care to avoid damaging the newly installed flooring.
Common Challenges when Installing Linoleum
While installing linoleum flooring is generally straightforward, some common challenges may arise. It’s essential to be aware of these potential issues and how to address them:
- Uneven Subfloor: An uneven subfloor can lead to bumps or sagging in the linoleum surface. Address this by leveling the subfloor properly before installation.
- Moisture Issues: Excess moisture can damage linoleum over time. Ensure that the subfloor is dry before installation and consider using a moisture barrier if necessary.
- Seam Visibility: In larger rooms, seams between linoleum sheets may be visible. Take care to align the patterns and use seam sealers to minimize their appearance.
- Cutting Mistakes: Improper cutting can result in ill-fitting pieces and an unprofessional finish. Measure carefully and use straight edges and utility knives for clean cuts.
- Adhesive Drying Too Quickly: Linoleum adhesive can dry out fast, especially in warm or dry conditions. Work in small sections and follow the manufacturer’s guidelines to avoid premature drying.
Things to Consider When Purchasing Linoleum
When you’re ready to purchase linoleum flooring or sheet vinyl keep these essential factors in mind to ensure you make the best decision for your space:
- Quality: Invest in high-quality linoleum for enhanced durability and longevity. While it may be a bit more expensive, the performance and longevity it offers will be worth it in the long run.
- Patterns and Colors: Choose a design that complements your interior decor and adds aesthetic appeal to your space. With a wide range of colors and patterns available, you can find the perfect fit for your style.
- Wear Layer Thickness: Check the wear layer thickness of the linoleum you’re considering. A thicker wear layer indicates better resistance to wear and tear, making your flooring more durable over time.
- Environmental Impact: Prioritize environmentally-friendly options by looking for linoleum products that are certified and have low VOC emissions. This ensures you’re making a sustainable and eco-conscious choice. At Tom Adams, we take your health, and the environment seriously and offer LOW V.O.C flooring.
- Installation Requirements: Consider your DIY skills and the complexity of the linoleum type you want. Some linoleum products are easier to install yourself, while others may require professional assistance for a seamless installation.
Get Help From Tom Adams
There are lots of things to remember when you’re installing linoleum floors or sheet vinyl. If you need help finding the perfect floor, or want help from one of our professional installers, get a free in-home estimate.