Replacing windows in your home can have a significant impact on energy efficiency, aesthetics, and overall comfort. Whether you’re a seasoned DIY enthusiast or a first-time homeowner, this step-by-step guide will walk you through the process of replacing windows in your house. From identifying the right time to replace your windows to selecting the perfect replacement windows, we’ve got you covered.
How to Know It’s Time to Replace The Windows in Your Home
If your window isn’t broken, It’s hard to know exactly when it’s time for a replacement. Here are some common, less obvious signs that indicate it might be time for a replacement:
- Feeling drafts and air leaks around the windows. Can you feel air coming through the window or hear whistling sounds on a windy day?
- You have trouble opening, closing, your window sashes or locking your windows. It may feel like the window is harder to manipulate. Maybe painted shut.
- There is noticeable condensation or fogging between the glass panes, cannot see clearly thru glass window
- The window frames are warped, rotten, or damaged, a very unsafe window.
- You’ve noticed unusually high energy bills during hot and cold months.
- You just don’t like how your window looks. They’re outdated and unappealing!
- You want more light, so you need a larger opening and different style of window.
If it’s been a while since you’ve purchased new windows. Here is a general guideline on how often you should.
Benefits of Brand-New Windows
Investing in brand-new windows can do wonders for your home. Besides enhancing energy efficiency and reducing heating and cooling costs, new windows reduce noise, increase home value and offer better protection against UV rays. Plus, they just look good!
Home Window Replacement
‘How To’ Guide
If you’re replacing the windows in your house, here are the steps you’ll typically need to follow.
-
Choose the right type of window
When it comes to windows, there are plenty of types, styles, and materials to choose from. From functional to aesthetic, you need to make sure you choose the right window for each room of your home. Here are some helpful guides that walk you through your window choice options.
-
Get the right measurements for your window.
Measuring a new window accurately is critical to getting the order right.
Here’s how to do it:A. Measure the Frame
- Measure the area between the inside edges of the window frame horizontally at three
points: the top, middle, and bottom. Record the smallest measurement as the window width. - Measure the distance between the inside edges of the window frame vertically at
three points: the left side, middle, and right side. Record the smallest
B. Measure the window opening
- Measure the width of the window opening from the left inside edge to the right inside edge at three points: top, middle, and bottom. Record the smallest measurement as the window opening width.
- Measure the height of the window opening from the top inside edge to the bottom inside edge at three points: left side, middle, and right side. Record the smallest measurement as the window opening height.
C. Check the squareness of the window opening
- Measure the diagonal distance between the top left to the bottom right corner and the top right to the bottom left corner of the window opening. The measurements should be equal if the window opening is square. If they differ, record both measurements and note the difference.
D. Check for any obstructions
- Take note of any obstacles such as handles, cranks, or molding that might interfere with the installation or operation of the new window. Measure the distance from these obstructions to the window frame or opening and record the measurements.
E. Double-check the measurements
- Review all the recorded measurements to ensure accuracy and consistency. Double-check the numbers and make any necessary corrections.
- Remember, window measurements should be as precise as possible. If you’re uncertain or feel uncomfortable taking the measurements yourself, it’s always a good idea to consult with a professional window installer or retailer who can guide you through the process
- If you plan to replace the jamb, measure its size.
- Measure the area between the inside edges of the window frame horizontally at three
-
Order your windows
After choosing your style and taking measurements, it’s time to order. It’s a good idea to double-check your measurements again before ordering. A good window provider or installer will be able to answer any questions you might have about the process. Gather Your Tools and Materials
Before you start on your window replacement, check that you have the following
tools and materials:A. Tape measure – for accurate measurements of the window opening.
B. Pry bar and Putty knife – for removing the old window and scraping off excess caulk.
C. Hammer and Screwdriver – for securing the new window and trim.
D. Drill and cutting tools – for making adjustments to the window frame if necessary.
E. Caulking gun and Caulk – for sealing gaps around the new window to prevent air leaks.
F. Level – to ensure the new window is installed straight.
G. Safety glasses and gloves – to protect yourself during the installation process.
H. New windows and window hardware. -
Prepare the Workspace
Preparing your workspace by following these steps:
A. Clear the area around the window, removing any furniture, decorations, or other obstacles that may get in your way.
B. Lay a drop cloth on the floor to catch any debris or dust.
C. Remove any curtains, blinds, or other window treatments.
D. Organize your tools in a manner that makes them easily accessible as you work. -
Remove the Old Window
Avoid unnecessary damage to the window frame by removing your old window carefully.
A. Use a pry bar to carefully remove the trim around the window. Keep the trim intact if you plan to reuse it.
B. Remove any nails or screws holding the window in place. Be careful not to damage
the frame.
C. Gently pry the old window out of the frame. Place the window somewhere safe to
avoid accidents.
D. Be careful not to damage the surrounding drywall or window opening. -
Prepare the Window Opening
To prepare the window opening for the new window:
A. Clean the window frame thoroughly, removing any debris or old caulking.
B. Measure the window opening again to ensure the new window will fit properly. Remember the smallest measurement is the one to go by.
C. Apply a new bead of caulk around the window opening. This will help seal the new window and prevent air leaks. -
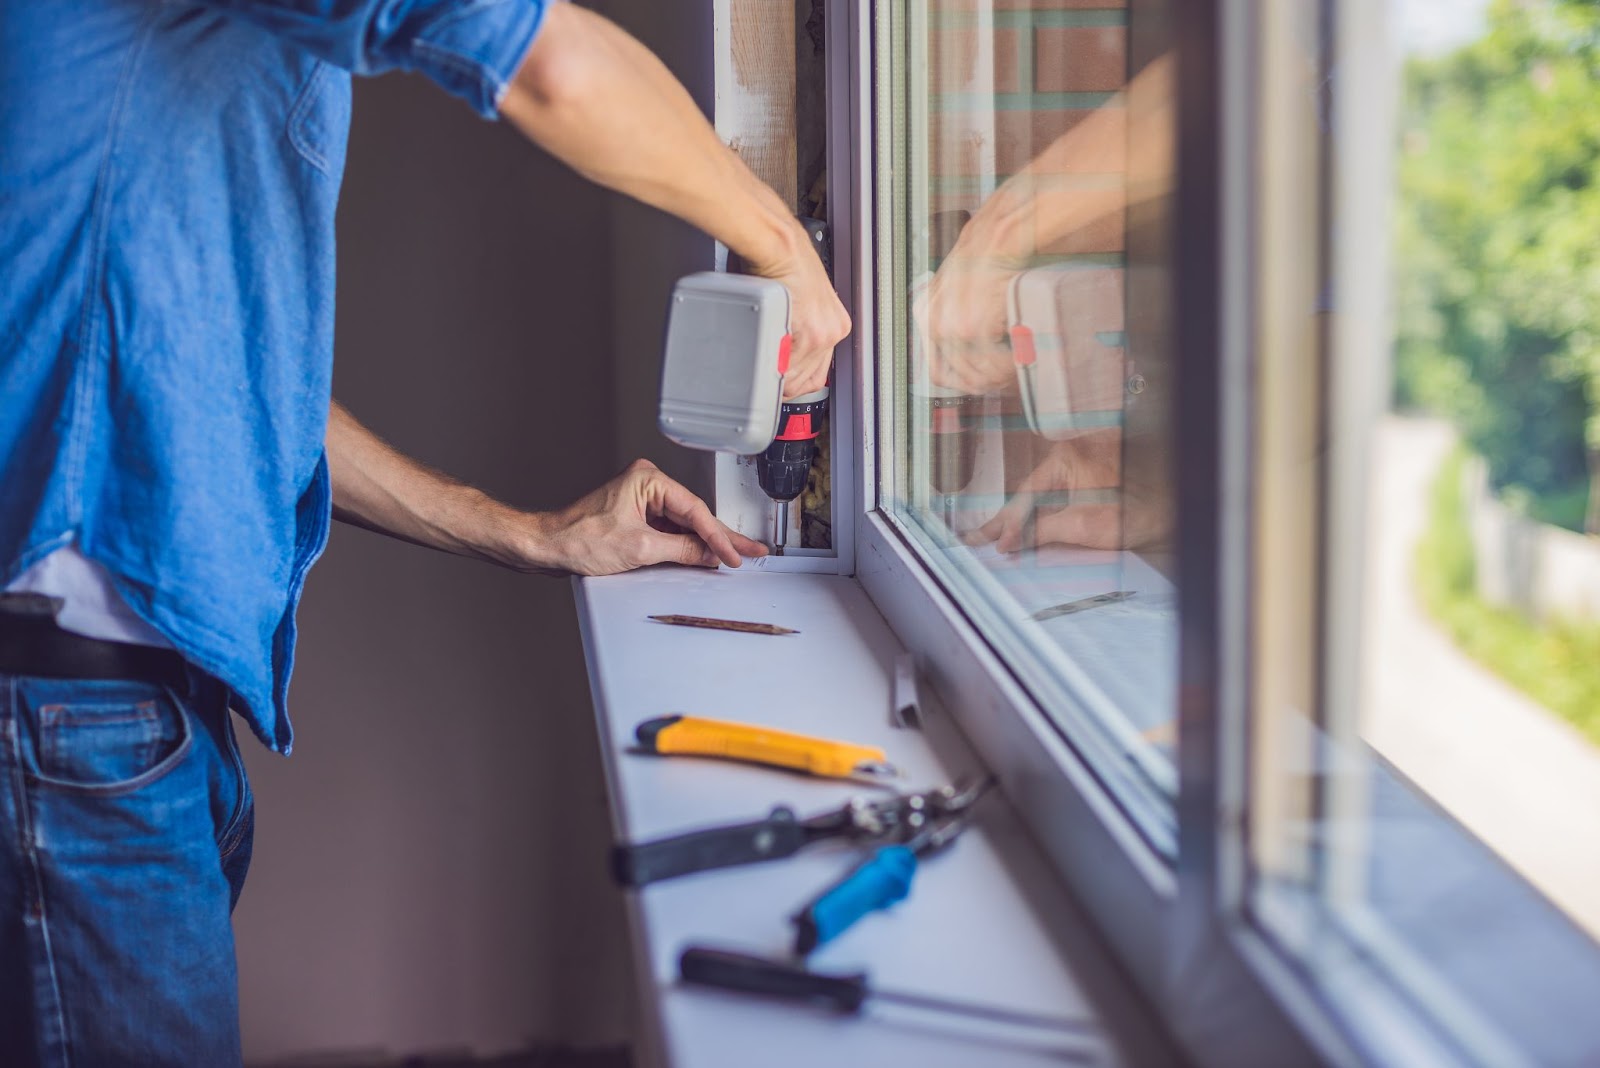
Installing the New Window
Remember, Installing a new window requires patience and accuracy. Mistakes can result in water leaks, and air infiltration. Here’s a short version on how it’s typically done.
A. Carefully lift the new window and place it into the opening.
B. Use a level to check that the window is plumb and level in the frame.
C. Secure the window in place by inserting screws or nails into the pre-drilled holes. Avoid over-tightening, which could warp the frame.
D. Open and close the window to check for smooth operation. Make any necessary adjustments before proceeding. -
Insulate and Seal the Window
Insulating and sealing the window helps prevent drafts and leaks.
A. Apply insulation around the window frame. This can be done with low expansion expanding foam or fiberglass insulation.
B. Use caulk to seal any gaps or cracks around the window to prevent drafts and air leaks.
C. Double-check that the window opens and closes smoothly after sealing and insulating. -
Replacing the wood Trim.
Once the window is installed, insulated, and sealed, it’s time to replace the trim. If the trim is wood , then normal carpentry comes into play. However, most have an aluminum clad trim that never needs painting. In this case a “BRAKE” is needed to bend the aluminum in the correct shape and size – something that may be better left to a pro.
- Carefully place the trim around the window, securing it with nails or screws.
- Fill any nail holes or gaps with wood putty or caulk. Let it dry thoroughly.
- Sand any rough spots for a smooth finish. Wipe away any dust before proceeding.
- Paint the trim to match the rest of your decor. Allow the paint to dry completely.
- Once the paint has dried, you can reinstall any blinds, curtains, or other window treatments.
By following this comprehensive guide, you’ll have all the information you need on how to replace windows in a house. Remember, window replacement can significantly enhance your home’s comfort, energy efficiency, and overall aesthetic appeal. If it seems too daunting, contact the professionals at Tom Adams Windows.
Remember, a professional will not install a premade or any window measured by someone else. Responsibility starts and finishes from measurement to installation.
When to Call a Windows and Door Installation Professional
Replacing windows can be a rewarding DIY project, but why risk your own home to mold and water damage from incorrect windows, window sizes, installation, and trim? Many situations require the help of a window and door installation expert:
- Complex window installations involving structural modifications
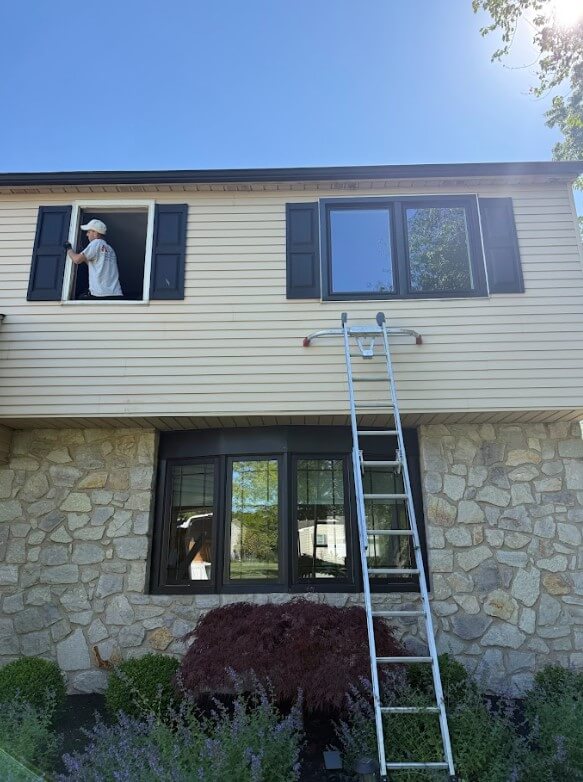
- Installing windows on upper floors that require scaffolding or specialized equipment
- Limited time or lack of experience in window installation.
If you need a professional, Tom Adams Windows and Carpet is here to help.
We serve the Philadelphia suburbs of Bucks County, Montgomery County, Chester County and Delaware County, Main Line and Lehigh Valley.
When you’re ready, you can give us a call or get a free, in-home estimate.